
Krita is a popular open-source digital painting application favored by artists, illustrators, and creative professionals. In recent years, its ecosystem has evolved to support AI-assisted image generation. One powerful aspect of AI image generation is the use of samplers, which determine how images are generated and refined over multiple steps. While Krita supports a basic selection of samplers out of the box when integrated with tools like Stable Diffusion, advanced users often want to expand this functionality. This guide explains how to add more samplers to Krita’s AI generation tool, why samplers matter, and how to troubleshoot common issues with tech support solutions.
What Are Samplers in AI Image Generation?
In the context of AI image generation—particularly with models like Stable Diffusion—samplers are algorithms that guide the generation process. They influence the aesthetic quality, detail, coherence, and style of the final image.
Popular samplers include:
- DDIM (Denoising Diffusion Implicit Models)
- PLMS (Pseudo Linear Multistep)
- Euler
- Euler A
- Heun
- DPM++ 2M Karras
Each of these samplers approaches the image generation steps differently, affecting how noise is removed and how structure is built up over time.
Why Add More Samplers to Krita?
By default, Krita’s AI plugins (like the Krita Stable Diffusion plugin) may only offer a limited selection of samplers. Adding more samplers:
- Expands creative control
- Improves generation flexibility
- Allows better comparison between styles
- Provides more optimized outputs for specific tasks (like texture generation or abstract art)
For users looking to fine-tune outputs or troubleshoot generation artifacts, having more sampler options can make a significant difference.
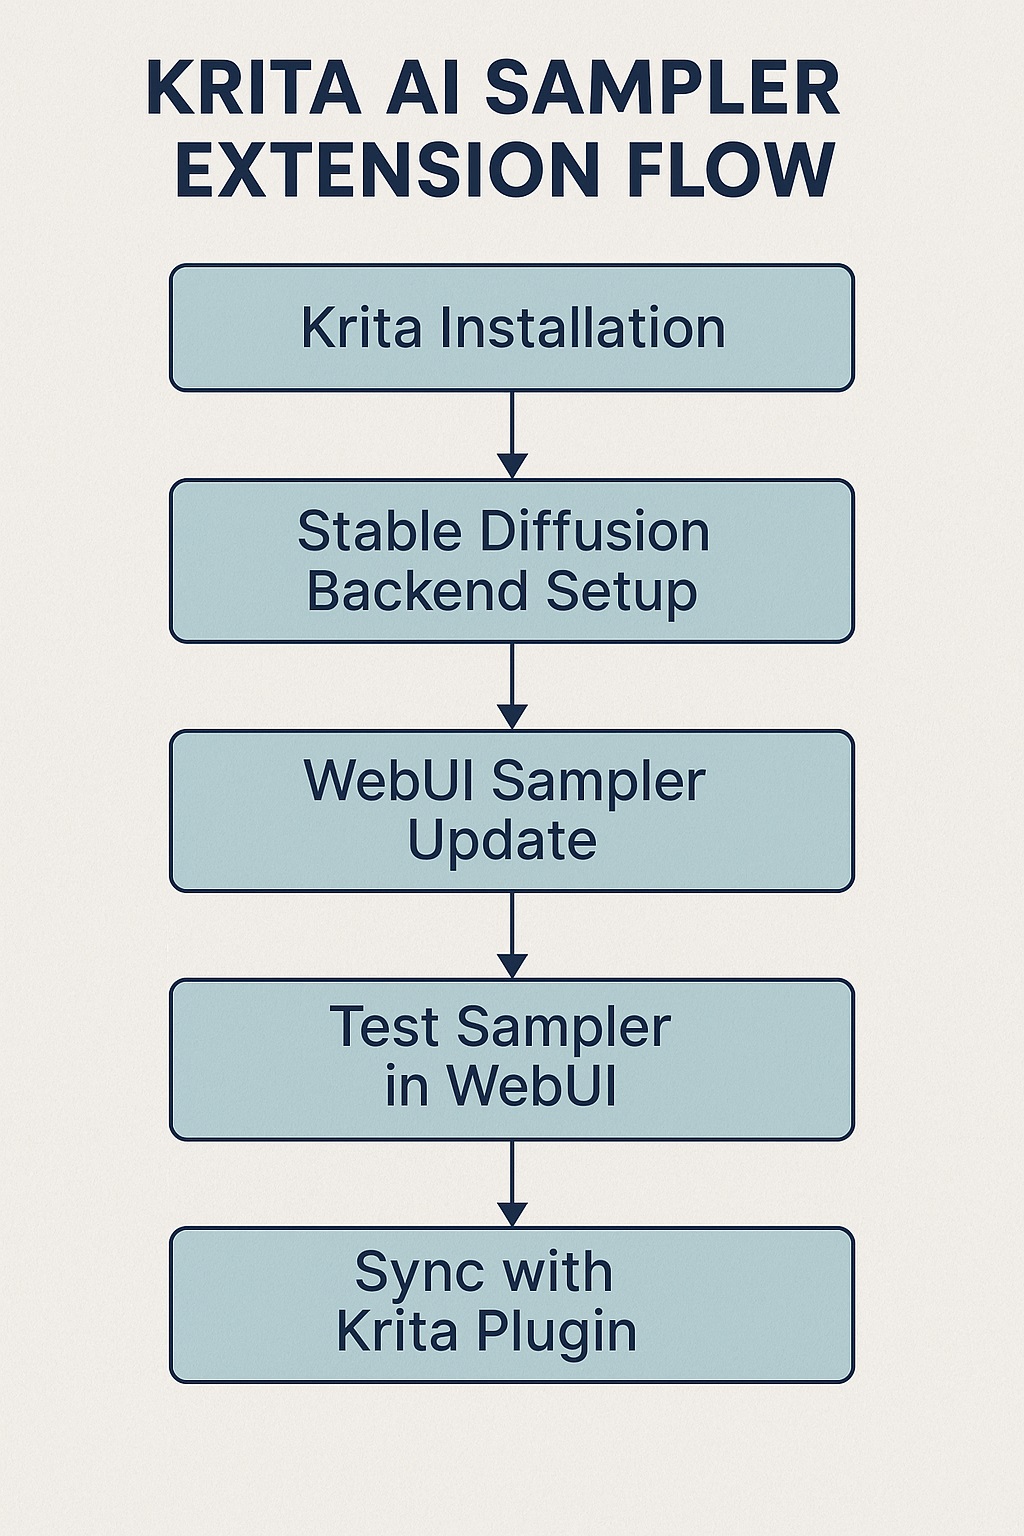
Setting Up Krita for AI Generation
Before adding samplers, ensure your setup is compatible with AI image generation:
- Install Krita (version 5.1 or later)
- Set up a Stable Diffusion backend (like Automatic1111’s WebUI)
- Install Krita’s AI plugin for Stable Diffusion (often found on GitHub)
This process involves some technical steps. For users unfamiliar with command-line tools or Python environments, consider seeking tech support or community guidance on forums.
Understanding Where Samplers Are Managed
Krita itself does not natively manage samplers. When using AI tools with Krita, the actual sampler options are provided by the Stable Diffusion backend, not Krita.
This means that to add samplers, you need to:
- Modify or upgrade the backend (like Automatic1111 WebUI)
- Add the appropriate sampler algorithms to the backend
- Ensure Krita is correctly interfacing with the updated backend
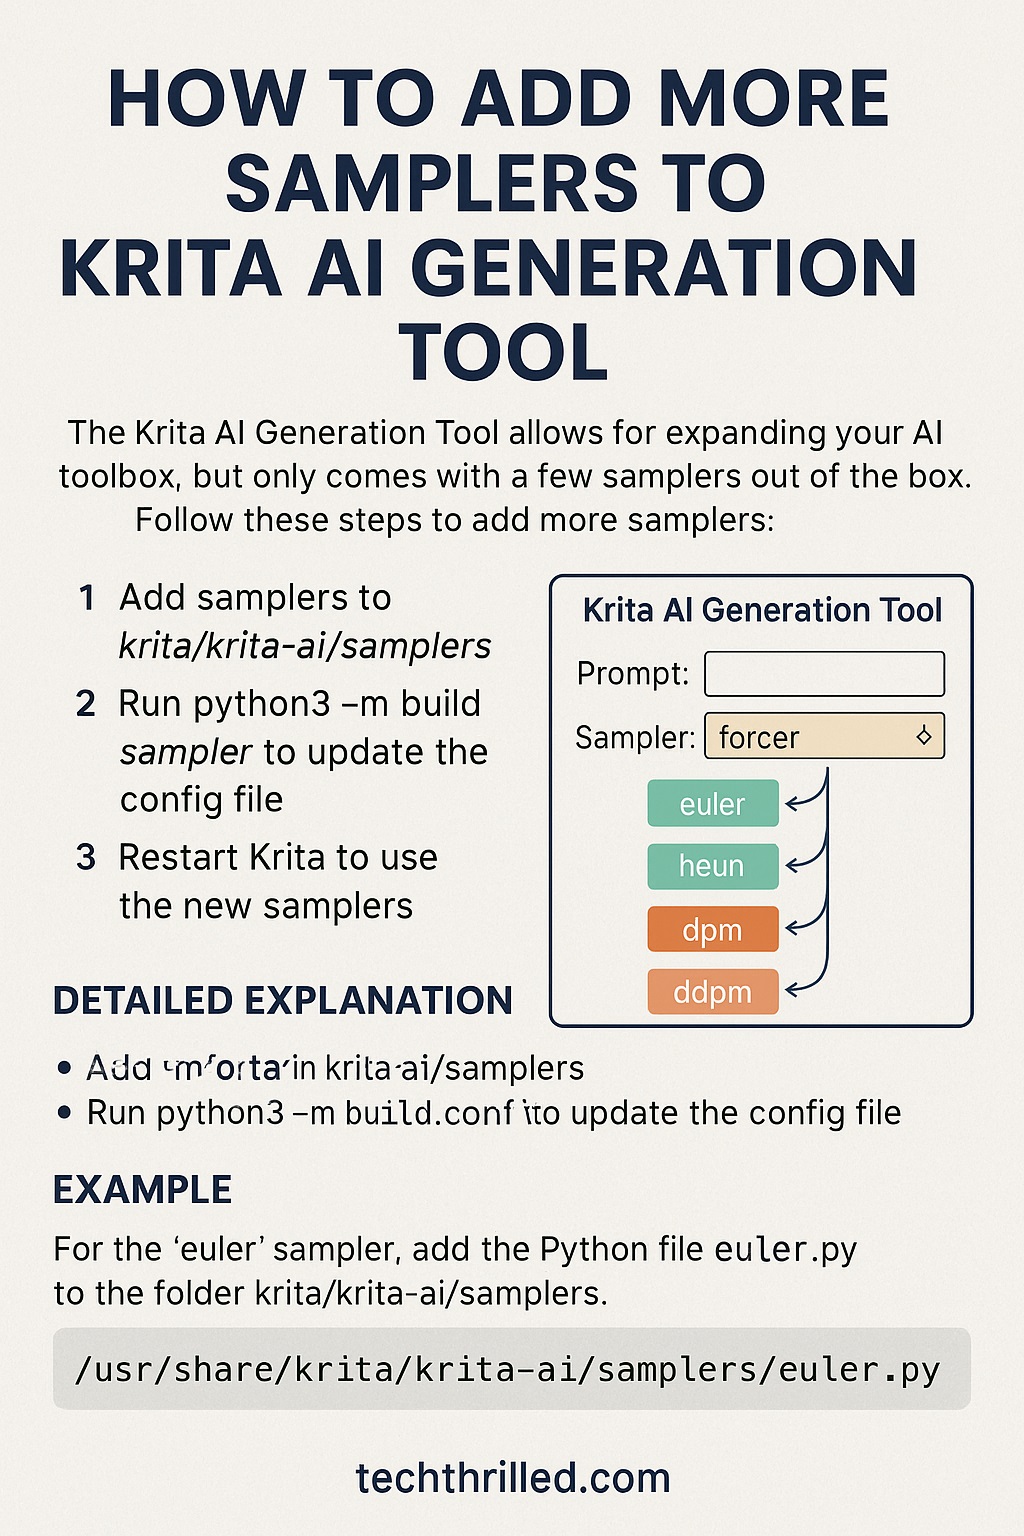
Steps to Add More Samplers to Krita AI Tool
Step 1: Access Your Stable Diffusion Backend
If you’re using Automatic1111’s WebUI:
- Navigate to the config.json or ui-config.json file in the installation directory
- Identify the sampler section or where sampler options are listed
Step 2: Update or Extend Sampler Options
You can either:
- Upgrade to a newer version of the WebUI (new versions often support additional samplers automatically)
- Manually add custom samplers by editing configuration files or integrating compatible plugins/extensions
Make sure the added samplers are supported by the model you are using. For instance, some samplers like DPM++ require updated schedulers and settings compatible with the model checkpoint.
Step 3: Test the Sampler in WebUI First
Before using the sampler through Krita, test it directly through the WebUI. This ensures it is working properly and eliminates potential troubleshooting layers.
Step 4: Connect Krita to Updated Backend
- Restart your Krita application
- Open the AI generation plugin
- Ensure the WebUI backend is correctly linked
- You should now see the new samplers listed in the dropdown menu
Sampler Addition Workflow
Troubleshooting and Tech Support
Adding samplers is a backend-focused task, and issues can arise during integration. Here are common problems and their tech support fixes:
| Problem | Cause | Tech Support Fix |
| Sampler not appearing in Krita | Backend not updated | Ensure backend supports the new sampler |
| Image fails to generate | Sampler-model mismatch | Use a compatible model checkpoint |
| Plugin crashes | API change or missing dependency | Reinstall plugin or check GitHub issues page |
| Output image quality is poor | Incorrect sampler configuration | Test different samplers for optimal results |
If issues persist, use community channels such as Reddit, GitHub discussions, or Krita’s official forums. Clear documentation and error logs will help tech support teams diagnose the problem faster.
Example: Adding DPM++ Samplers
Let’s say you want to add DPM++ 2M Karras, a sampler known for high-quality detail:
- Update your WebUI to the latest version
- Confirm DPM++ is available in the dropdown sampler list
- Test generating an image
- Open Krita, load the AI plugin
- New sampler should now appear in Krita’s selection
This sampler is particularly effective for photorealistic portraits and texture fidelity, making it ideal for professional concept art.
Best Practices for Managing Samplers
- Keep your Stable Diffusion backend updated regularly
- Use a version control system like Git to manage plugin changes
- Document which samplers work best for specific types of artwork
- Build a sampler reference board with sample outputs
- Always test new configurations before full production use
Sampler Comparison Chart
| Sampler | Speed | Detail | Style Coherence | Best Use |
| Euler A | Fast | Medium | Low | Sketches |
| DDIM | Medium | High | Medium | General Use |
| DPM++ 2M Karras | Slow | Very High | High | Portraits, Textures |
| Heun | Medium | Medium | High | Stylized Artwork |
Security and Compatibility Tips
When modifying AI systems, security is essential. Avoid downloading plugins from unverified sources. Ensure that your Python environment and all dependencies are sandboxed.
Use virtual environments and test changes in isolated setups before adding them to your primary production workflow. Always backup your config files and document the changes.
External Resources
- Stable Diffusion WebUI GitHub
- Krita Official Website
Final Thoughts
Adding more samplers to Krita’s AI generation tool enhances your creative toolkit and opens doors to better quality, more refined images. With the right backend setup, proper configuration, and a bit of patience, your digital art workflow can become significantly more powerful.
While technical hiccups may arise, remember that good tech support—be it community forums, GitHub discussions, or professional help—can make all the difference. Whether you’re a beginner artist or a seasoned designer, learning to customize and expand your AI tools is an investment in your creative future.
Join the TechThrilled Community
Stay updated with deep dives into AI, digital creativity, and open-source tools. Subscribe to our newsletter, share your thoughts in the comments, or join our community to explore more.
Your creativity deserves the best tools—let’s build them together.